
With Studiometry Cloud and Studiometry 12.2 or newer, you can send reports, estimates, and purchase orders to your Clients for approval.
You will first need to set up access for your Clients. To do this, please see this Knowledge Base article. Once your clients have their access configured, it's very easy to send reports out for approval using the following steps.
Step 1. Create an estimate, purchase order, or report.
Once a Client is setup with Studiometry Cloud access, simply create a new Report on any of their projects. You can do this by going to the Project's Reports section by selecting a project, clicking the Project Overview dropdown, and selecting Reports. Next, click the plus (+) button, or press Command-N (or Control-N on Windows).
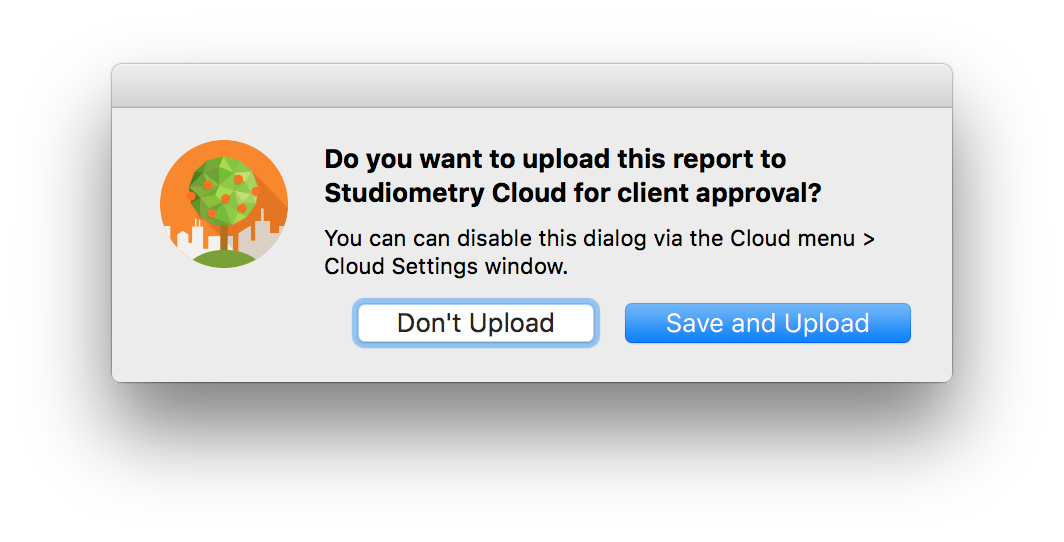
In the window that appears, select your template and your items to add to the report. When you click OK to save, Studiometry will automatically ask if you'd like to upload the item to Studiometry Cloud. Click Save and Upload and Studiometry will open the Client Approval window and automatically initiate an upload.
Step 2. Let your Client know that there's an item awaiting their approval.
After Studiometry uploads your report to Studiometry Cloud, you'll be able to easily email your clients and contacts about the pending item. A window will appear that will list out all of the client and contact email addresses. Select one or more to quickly send a notification. Studiometry will use your email settings from the Preferences Window > Emails section to send the subsequent email.
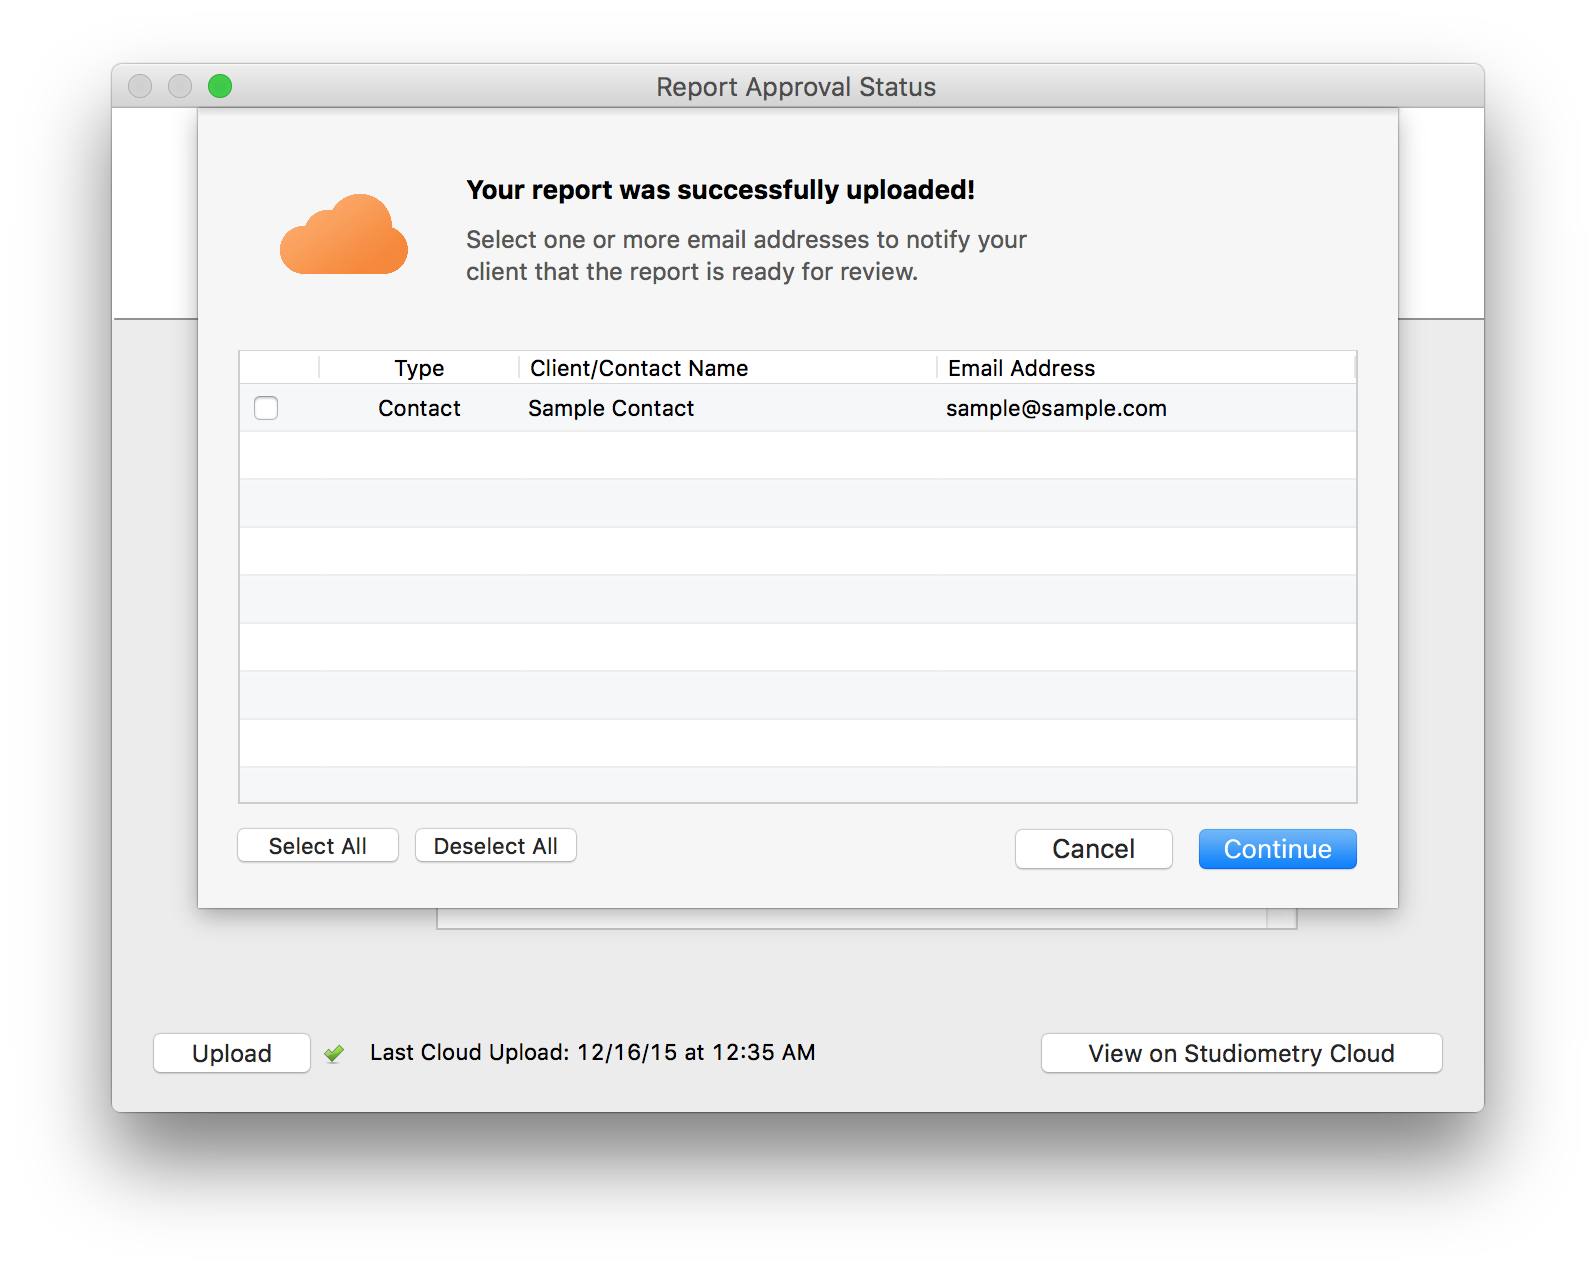
To customize the default email content, select Cloud Menu > Cloud Settings Window and then under the Report Approval Settings section press the Customize Default Subject & Body button. Please note, these settings are per-computer, so if you send the notification from another computer it will be different if you've customized this field.
Step 3. Wait.
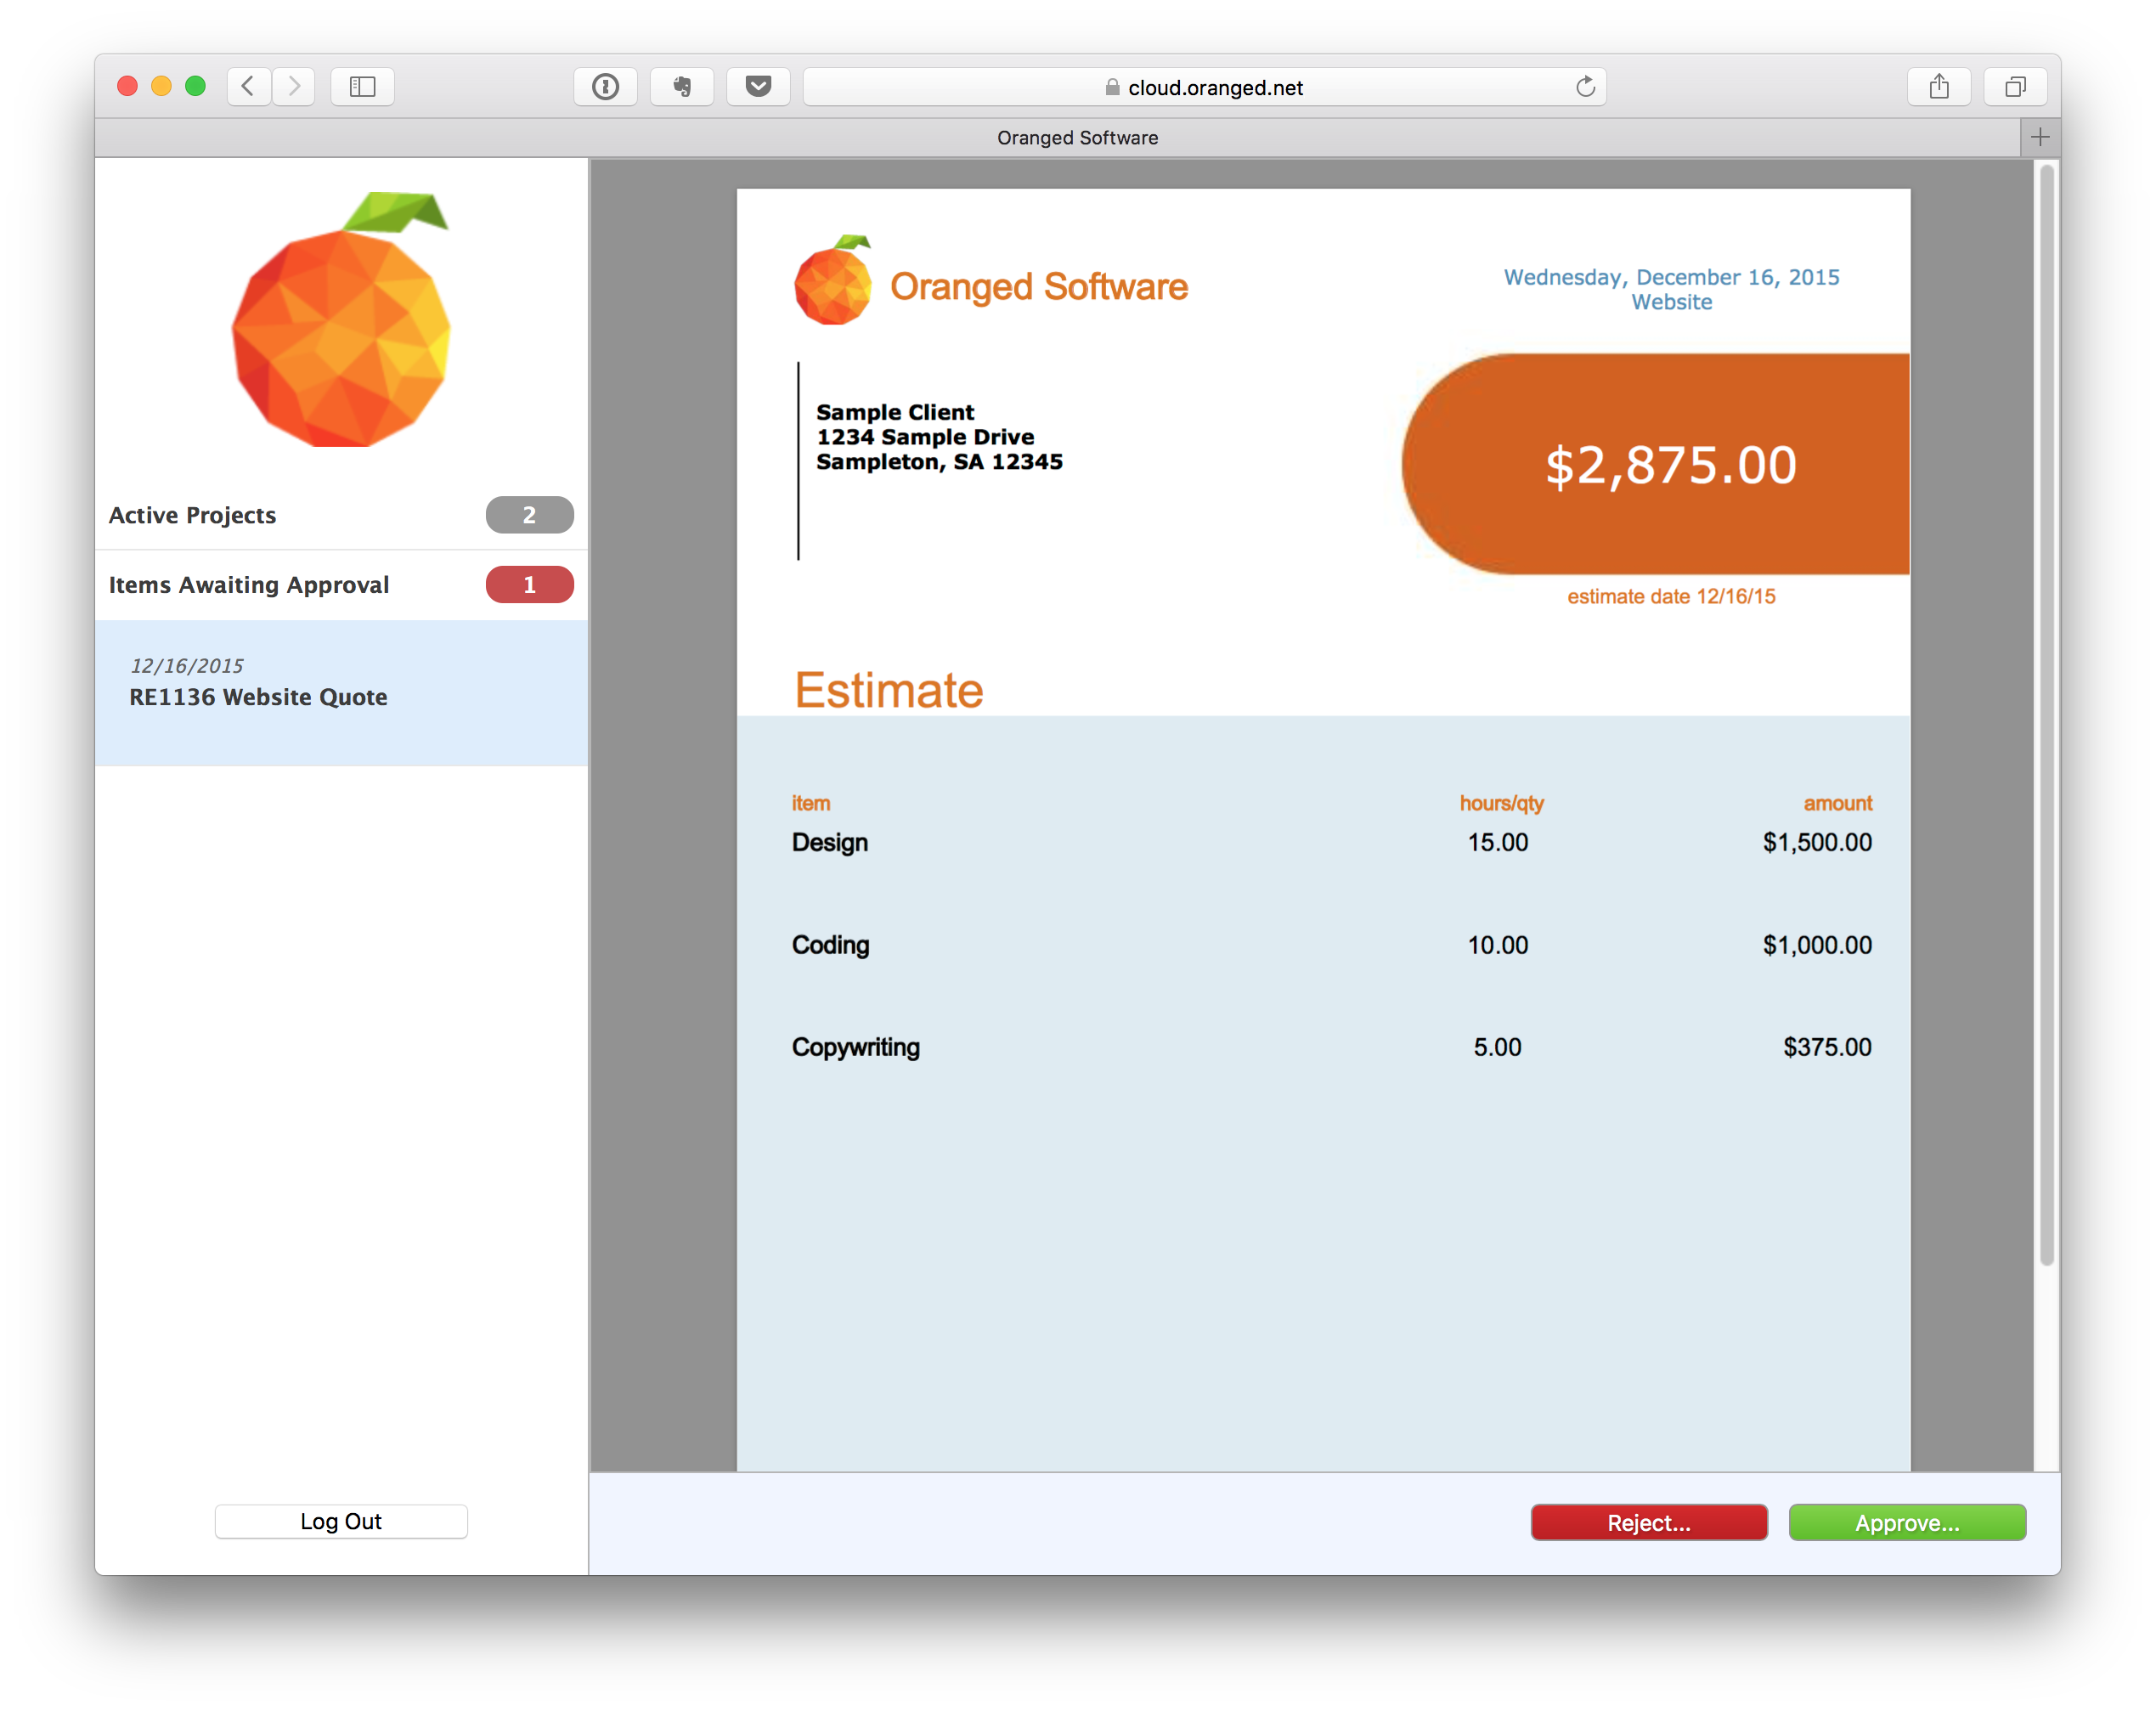
Now your client gets to log in to Studiometry Cloud and approve or reject the report. They will be presented with your branded Studiometry Cloud logo and page, and see whatever items you've given them permission to access.
Step 4. Rejoice.
Once your client responds, you'll receive a notification in Studiometry and the item will be updated in your database. You can enable/disable notifications on a per-employee basis using the Notification settings window.

Other Notes.
If you ever need to access a report's Client Approval window, you can easily get there by doing any of the following:
- Right-clicking on the Report and selecting View Client Approval Status
- Editing the report, going to the Client Approval tab, and clicking Edit Approval Status
- Make any change to a report associated with a Studiometry Cloud-enabled Client. The approval status window will be opened automatically.
Also, if you make any change to a report that is pending approval or uploaded, Studiometry will ask if you'd like to update the generated content on Studiometry Cloud. This is a good idea, you don't want your clients approving an out of date estimate.
0 Comments